


Chatter is a Salesforce’s version of Twitter/X. Chatter allows Salesforce users to collaborate on records.
Admins can create Chatter Groups to allow a group of users to discuss topics and work on ideas together.
Sometimes, as an Admin you may want to add many (or even all) Salesforce users to a Chatter Group. Below I explain how to do this using Salesforce Data Loader. It’s not possible to add many users to a Chatter Group through the Salesforce front-end. Users can only be added one at a time from the Group itself, if you are a Group manager.
Follow these steps to add many users to a Salesforce Chatter Group using Data Loader.
- First, create a Chatter Group – this will give you the Salesforce CollaborationGroupId for the group. The CollaborationGroupId is the Salesforce 18ID specific to the group. You can get the ID from the URL of the Chatter Group. It will look something like this: 0F9P200000001CDKAV
- Next, we need the Salesforce IDs for the users you want to add to the Chatter Group. To do this, create a User report that includes User Salesforce 18IDs – this will give us our MemberIDs for the upload. A user ID looks something like this: 0054J000006k4iVQAQ. Download to CSV.
- We want to create an upload file with the following columns:
- CollaborationGroupId = the Chatter Group ID
- MemberId – user ID for each person you want to add
- CollaborationRole = Standard OR Admin
- NotificationFrequency = W, D, P OR N. The frequency at which Salesforce sends Chatter group email digests to this member i.e. Weekly, Daily, Every Post OR Never
Now that we have our CSV file prepared, we move on to the Data Loader part.
- Open up Data Loader – you can download it here if you have never used it before. It’s an invaluable tool for any Admin.
- We are going to use the Insert option.
- Login then Next
- Then you need to click on the checkbox to ‘Show all Salesforce objects‘ – many a newbie dataloader has missed that and couldn’t find rarely used objects.
- We select the object called Group Member(CollaborationGroupMember).
- Next, browse and select the file we created earlier.
- We then need to create or Edit a Map and then Auto-Match Fields to Columns. As we have given the CSV file the names of the columns above, Data Loader will auto-match the file columns with the Salesforce fields. Nice. If that doesn’t work, then simply manually map any remaining fields.
- Click Okay, then Next.
- Click Browse to select the directory you want to store the success and error files. Then Okay, Finish.
- Let the upload run – hopefully, there will be no errors. If there are errors, then open up the Error file and see what the error message says.
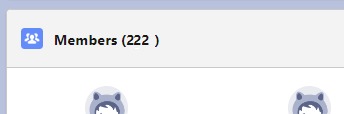
- Once the data load is fully complete then go to your Chatter Group on Salesforce. At the bottom of the Chatter Group page, you’ll see all the Members. All the Users you uploaded will now appear in the Members section.
- Finally, have a cup of tea/coffee and pat yourself on the back. Job well done.
Leave a Reply